
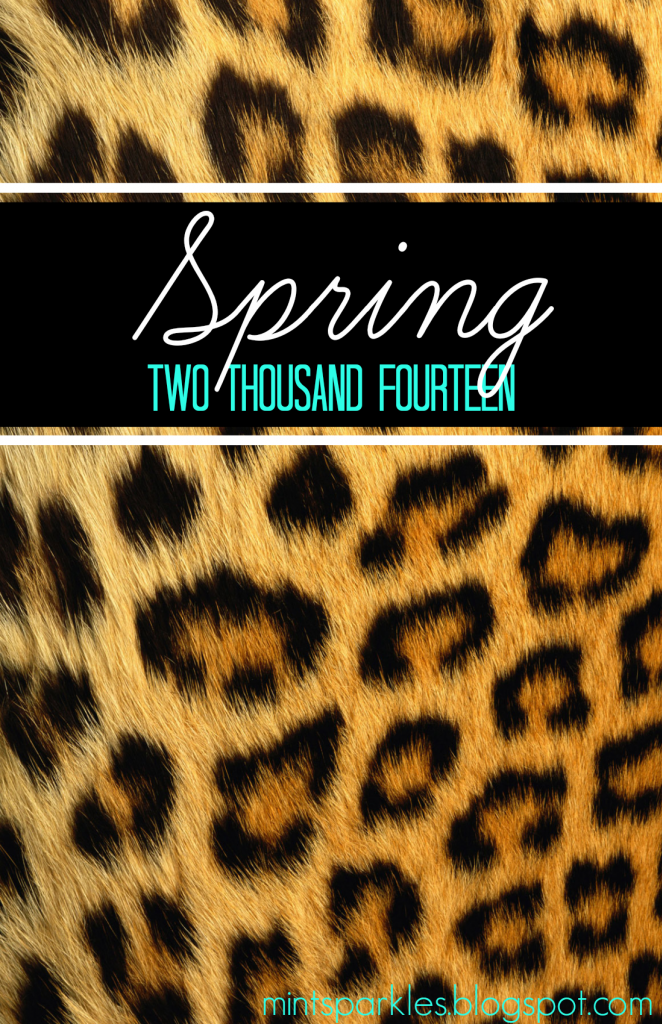
Hey guys! So for those of y'all that saw my instagram post yesterday, I posted about a cover that I created for my binder for my classes this spring. It looks a little something like this:


So the first thing that you want to do it go to resize, uncheck keep proportions, and then set the size to 1100x1700.

Next you want to go to the overlay tab, and select Your Own at the top, then add whatever image that you would like to be your background.

Then just drag the image until it covers all the white space.

Next you are going to add some overlays. So click on geometric, and then add a rectangle, which you then need to drag to create the size that you would like. Then add another smaller rectangle, change the color to white, and then resize to look more like a line. Then just right click and duplicate that so you don't have to worry about creating another that is exactly the same size.

This is what it looks like with the overlays in place. Obviously since you might want to do something a little different feel free to play around and create your own combination of overlays!

Next I added some text (again feel free to personalize however you want!) A good trick when adding text that you want centered it to actually click the button to center the text in the box itself and then drag the edges so that they are at the edges of your design, then you don't need to worry about making sure it's centered.

THE FINISHED PRODUCT! So now you want to save that bad boy that you just created to your computer. MAKE SURE that you save it as a .png file!

Next you want to copy that image from wherever you saved it on your computer.

Then open up Pages, if you have a mac or it should work just fine in word as well. If you are using pages make sure to zoom out to 75% then paste your image.

Drag it to fit the size of the paper, and adjust as needed. TADA! You just learned how to create some super awesome custom covers for every binder that you own! On the other hand if you just really really like the one that I created, then you can download your own copy right HERE. Just right click and then save the image. Enjoy!

No comments:
Post a Comment